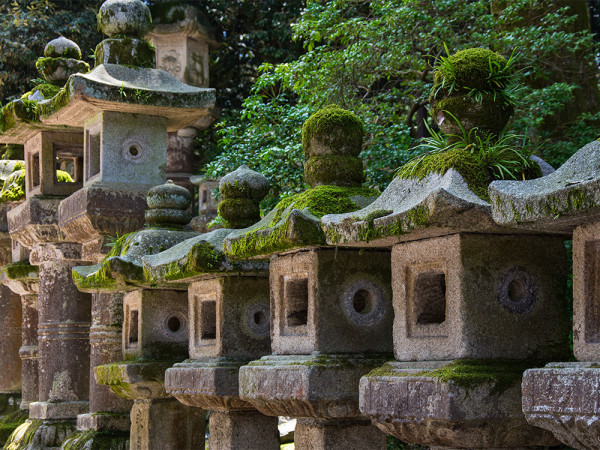
Monday was a momentous and historic day in Minnesota. The state Senate debated and passed a bill that made Minnesota the twelfth state with marriage equality, the third state to advance that cause in three weeks, and the first state in the midwest to do so legislatively. A large crowd supporting the bill, sprinkled with a small number of bill opponents, filled the capitol rotunda and many other parts of the capitol. They demonstrated, sang, chanted, and cheered through the afternoon as the senators debated the bill. It created a festive and electric atmosphere, and generated a lot of noise in that beautiful, grand structure. But the real beauty was democracy at work to achieve what is good and right and just. What a noise erupted, and what joy, when the Senate took its vote and passed the marriage bill. It was deafening. It was amazing. Governor Dayton signed the bill into law the next afternoon.
The panoramic photo above (click on it to see a somewhat larger version) was taken Monday, May 13, 2013 in the capitol rotunda during the afternoon while the Senate debated the bill and the crowd anticipates passage. Six separate photos were carefully stitched together creating a 58.2 megapixel image. I hope to have more photos from the afternoon available soon.
I’m very pleased to announce that my panoramic photograph of the wonderful cloister at Bad Wimpfen, Germany (seen below) has been accepted for the 2012 Fine Arts Exhibition at the Minnesota State Fair! The photo will be on display during the State Fair from August 23–September 3, 2012 in the Fine Arts Building.
The Minnesota State Fair Fine Arts Exhibition displays works of artists living in Minnesota selected by a jury process from submitted entries. Per the State Fair website, there were 2504 pieces submitted in preparation for the 2011 State Fair and 361 works accepted. Each year it is a great show with many talented artists included, so I am especially proud to be included in this year’s exhibition.
Now, a bit about the photograph and it’s subject. Last year I had the occasion and pleasure to visit Bad Wimpfen, a small town in Southern Germany located along the Neckar River between the cities of Heidelberg and Heilbronn, and the amazing and beautiful old monastery that resides next to the river there. The gothic cloister was built in stages during the 13th through 15th centuries, and lovingly restored during the last century.
In the panorama photograph, digitally stitched together from five photographs, we see the wings of the cloister built in the 14th and 15th centuries. The dark corridors of the cloister are beautifully lit with afternoon light streaming in the open windows to the courtyard. There is here a sense of both enclosure and openness, of shelter and airiness, of light illuminating the darkness, all infused with a contemplative atmosphere.
It was a real pleasure to have a change to spend many hours photographing the cloister and the town over the course of several days. I look forward to seeing it on display at the State Fair, and I invite those of you able to attend this year’s fair to visit the Fine Arts Building and peruse the many and varied work of Minnesota artists to be displayed there.
Almost certainly Higgs!
A conference at CERN, the site of the Large Hadron Collider, on the border of Switzerland and France, recently unveiled current and ongoing results of two experiments, each a collaboration of thousands of scientists around the world. The Large Hadron Collider is the world’s largest particle accelerator, capable of smashing particle beams into one another at incredible energies. The CMS and ATLAS experiments watched the results, and they’ve both found something. read more…
Father Anonymous at Magdalene’s Egg recently posted about faculty changes at Lutheran Theological Southern Seminary, which will shortly be completing its merger with Lenoir-Rhyne University. In the process of the merger, three faculty members will be leaving, their positions being eliminated.
A little background is in order for any who may not be familiar with these institutions. Lutheran Theological Southern Seminary (LTSS) is one of the eight seminaries of the Evangelical Lutheran Church in America (ELCA). It is located in Columbia, South Carolina. It has a history going back to 1830. Founded in 1891, Lenoir-Rhyne University is located in Hickory, North Carolina. It is a college of the ELCA. Facing financial pressures, Southern Seminary is merging with and becoming the graduate theological school of Lenoir-Rhyne University.
A comment on Fr. Anonymous’s blog points readers to a letter from the outgoing president and board chair of LTSS. It provides some institutional history and background to both the merger and the decisions to reduce the faculty size. (The letter can be found at http://www.ltss.edu/public/files/docs/Letter_to_LTSS_Constituents_062512.pdf.)
One item from that letter that stood out for me was a statement that, since 2008, support from the ELCA for the programs of LTSS has declined by 30%. I find that amount of reduction in support from the church alarming. In my estimation, among many other pieces of information, that should stand out as the most significant in the letter. read more…
A Luminance Layering Technique for Enhancement of Digital Photography, Part 2
In part 1 I described the general idea and the source for my luminance layering technique for enhancing terrestrial digital photographs. Here in part 2, I will share a more detailed description of the particulars of my process.
I’ve found the luminance layering technique to be useful on images that are a bit flat and could use added contrast, especially where anything but a small adjustment by curves is needed. I’ve found it especially useful on HDR images, which I find can often come out of HDR processing without sufficient contrast. It also can be useful on images where enhanced textures are key or where additional definition of the shapes and forms of objects could be useful. It can also be useful to bring clarity to an image where a limited dynamic range in a photo makes it seem somewhat foggy. The technique requires trial and error to determine if it is appropriate to the image in question. It may not be particularly useful in situations where limited contrast or a softened image is desired.
Before I begin with the luminance layering technique, I’ve already set white balance and done my conversion from RAW format, processed the HDR if appropriate, and adjusted exposure, saturation, color, and so forth. Most of the editing should be complete on the image before attending to seeing if luminance layer adjustments are appropriate, but significant adjustments to contrast should be saved until this point.
This photo of the ceiling of Heidelberg’s most prominent old city church, the Church of the Holy Spirit, shows the starting point before embarking on the luminance layering technique.

This image could be quite acceptable as it is. But this version is a little flat, with something wanting when it comes to defining the curved shapes in the ceiling. The white vaulting and the stonework arches could perhaps show a little more dimensionality. This is something one would find in a good black and white rendering of this subject, as it only relies on values, not colors, to picture the scene.
Being a good candidate for the luminance layering technique, the next step is to convert this color image to a good black and white image. There are a number of ways to accomplish this with various results. For this technique to be useful, the method of conversion should give a high degree of control over this conversion process, especially over contrast and brightness. My tool of choice is Silver Efex Pro 2 by Nik Software (using Photoshop as a host program). This software is well suited for this technique. Besides creating wonderful black and white images from color digital files with great ease, some of its specific adjustments are very useful here. Besides a fairly straightforward traditional contrast adjustment, the software has a slider called “soft contrast” which applies the effect dynamically to prevent edges from getting too harsh and or having highlights and shadows flattened and losing detail. Further the software contains an adjustment called “structure.” This is a very useful tool which applies a sort of local contrast away from the edges, and thus can enhance the textures of the image. The software gives the user fine control over brightness adjustments, and allows you to introduce film grain and colored filter simulation if desired. I usually don’t add grain or filter adjustments during this process, but it could be useful at times to achieve one’s desired result. Perhaps the most valuable feature here is also the ability to make selective adjustments to areas of the image based on underlying color and contrast data. This would allow the user to select an area where extra contrast is needed, or darken or lighten regions of the image without having to apply complicated layer masks.
Since we are working in black and white, and not directly on the color image, the contrast and structure adjustments can sometimes be pushed a bit further than would look at all satisfactory if similar plug-ins were used to enhance the color image directly. Yet a word of caution, the black and white you create cannot be one that pushes to the extremes. If the resulting black and white image is good to look at, it’s a good chance that the final color image will be good as well. But the changes in the final image may only need to be subtle to bring out the best qualities of the photograph.
The sliders in Silver Efex Pro are displayed on a percentage basis. Here I have boosted the contrast by a significant amount using the soft contrast slider. A fair amount of structure was added and the overall brightness of the image was increased somewhat, partially to compensate for darkening of parts of the image caused by the increased contrast. There is no science for determining what the settings should be. Always adjust to what looks best for your image and what sort of effect you are after. My black and white conversion is below.

The increased contrast helps to accentuate a the shading in the white vaulted ceilings as well as the convex curve decorating the arch stonework.
The new layer holding this black and white image is positioned above the adjusted color layer, and the blending mode is changed to luminosity. To this I will often add a very slight s-curve on an adjustment layer to help keep the darks grounded a bit more firmly. The following image, made more pleasing with increased depth and contrast, is the result.

Note, especially, how the shape of the vaulting is now more apparent, being better defined by the shading, and how the image seems cleaner, crisper, and makes use of a fuller dynamic ranger of brightness. For this image, at least, I’ve been unable to obtain a result this satisfactory with curves or other tools for adjusting image contrast.
I invite you to take a look at a number of further examples, with before and after images, which are available here. In addition, a great many of the images in my book of photographs from the small town and cloister of Bad Wimpfen, Germany utilize this technique to add clarity, texture, and contrast. I invite you to take a look.
Larger versions of the images of the Heidelberg church ceiling used in this post are available here.
A Luminance Layering Technique for Enhancement of Digital Photography, Part 1
While doing my digital darkroom work on photographs from Europe, I became dissatisfied with the results I was getting from a few HDR (high dynamic range) images, finding them too flat and without sufficient contrast and depth. Standard methods to increase the contrast on these images were not achieving the results I wanted, perhaps because I am reluctant to commit to contrast adjustments early in the process. But I didn’t want to simply tolerate images that didn’t quite have sufficient contrast, lacked texture where appropriate, or flattened out shapes and shading.
Pondering this quandary, a technique that is common in digital astrophotography came to mind. The technique is often called “luminance layering” and was developed independently by Dr. Kunihiko Okano and Robert Dalby in 1996. Color digital astrophotographs are usually created by taking a series of grayscale exposures through separate color filters (commonly red, green, and blue), and then combining those series into a color composite. While this can produce good color information, it tends to produce images with poor contrast and a fair amount to noise, due to the filters limiting the transmission of light to the sensor. An unfiltered image produces better contrast and cleaner images, but would lack the color for color imaging.
Luminance layering adds a fourth set of images to the processing, namely an unfiltered black and white image with good contrast. Often the astroimager will use longer exposures for this unfiltered image in order to increase contrast and detail. This exposure records the detailed brightness levels in all colors, or the luminance levels of the object being imaged. These files are then processed so that the color data is taken from the combined color exposures while the brightness level for a given pixel of the image is taken from the luminance layer. In Photoshop, this is accomplished by putting the luminance image in a layer above the color composite and setting its blending mode to “luminosity.” When done with care, this results in an image with greater detail, improved contrast, less noise, and good color. In other words, it often produces a more aesthetically pleasing image.
What if I were to adapt this technique to terrestrial photography?
Clearly, many of the details of the process will change. We begin with a color image produced by our digital camera. And since the color filters are built into the camera’s sensor assembly, we don’t have a true luminance image like in the astrophotography process. But one can convert a color digital image to a black and white image. read more…
I’ve just published a collection of photographs from the beautiful, charming, and historic town of Bad Wimpfen, Germany. Bad Wimpfen: Photographs from a Southern German Town takes you on a tour through the medieval gothic monastery church and cloister and into the historic center of this small town in Germany’s southern state of Baden-Württemburg. It is available in a large hardcover with premium paper, which looks spectacular, and a smaller, less expensive paperback edition. Please take a look at the book’s own small website or the preview below. Copies can be purchased through any of these links.
From the front cover flap:
Nestled along the Neckar River in Southern Germany, Bad Wimpfen is a beautiful and picturesque town notable for its historic character and surviving medieval buildings. On the hill above the river, amongst the half-timber houses and winding streets, are the remains of an imperial palace. Below, next to the river, rests a monastic cloister and its church. Overlooking it all, the imperial palace’s nearly eight hundred year old Blue Tower still keeps watch.
In these eighty-four images, photographer Mark C. Christianson explores the town and cloister of Bad Wimpfen. His photos range from wide vistas and townscapes, through investigation of intimate details. He pays special attention to the details of the cloister—the town’s architectural gem—and the contemplative play of light and darkness within the sheltered openness of the cloister’s medieval passages.
Come along on a journey into a small, historic German town found in our own contemporary world: Bad Wimpfen.
read more…


